


To protect your users' personal data, you must set up a consent mechanism. A GDPR banner allows your visitors to consent to data tracking or not, according to you users' choice. In this tutorial, we will learn how to use Google Tag Manager to install and configure CookieFirst, a consent management tool.
Why CookieFirst?
CookieFirst makes GDPR management easy:
no need to design and code a banner yourself
no need to manually manage your cookies
your cookie policy is generated automatically.
It's the ideal tool to ensure your site's GDPR compliance.
Create a CookieFirst account
Navigate to the CookieFirst website to create an account. Once you're in the CookieFirst administration, add a new domain:

Select the payment plan that suits you best. There is a free option, but you may consider a paid version, depending on your needs. Enter your domain name, your site URL, and your privacy policy URL. Your domain is created; now go to the settings to configure it:

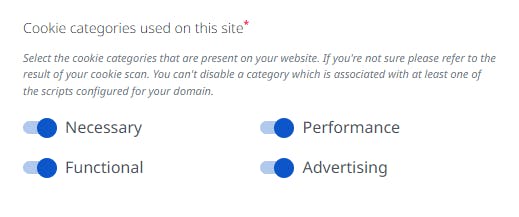
In the "domain settings" category, select the consent categories you want to use (Necessary, Functional, Performance and Advertising):
Also enable Google Consent Mode in the banner settings. This will allow you to use Consent Mode in Google Tag Manager:

For more details on Consent Mode, see Google's documentation.
Save your changes, then go to "your integration script". Copy your API key for the next step:

You can also modify the style of the banner ("Custom styling" menu). You'll have more styling options with a CookieFirst subscription.
Install CookieFirst on Google Tag Manager
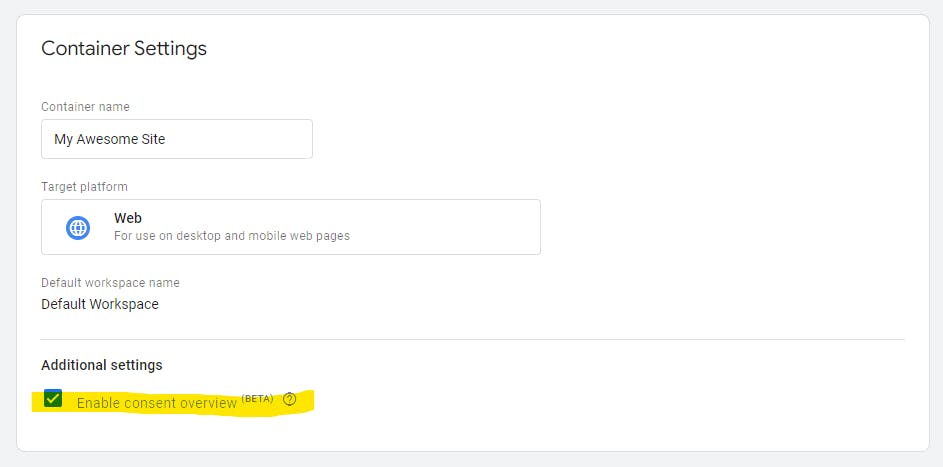
Browse to Google Tag Manager, make sure consent mode is enabled in your container settings:
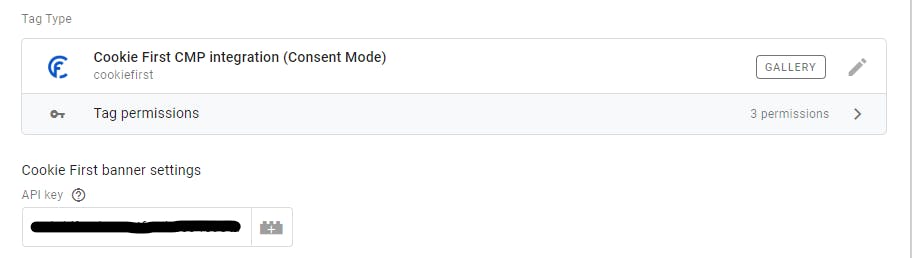
Then add a new tag. Explore the third-party tag gallery and search for CookieFirst. You will find the tag model designed by CookieFirst for integration with Google Consent Mode:

Add the tag, and copy your API key in the configuration:
Add the consent initialization trigger for this tag:

We are now ready to configure our first tag with CookieFirst.
Configure GA4 tag with CookieFirst in GTM
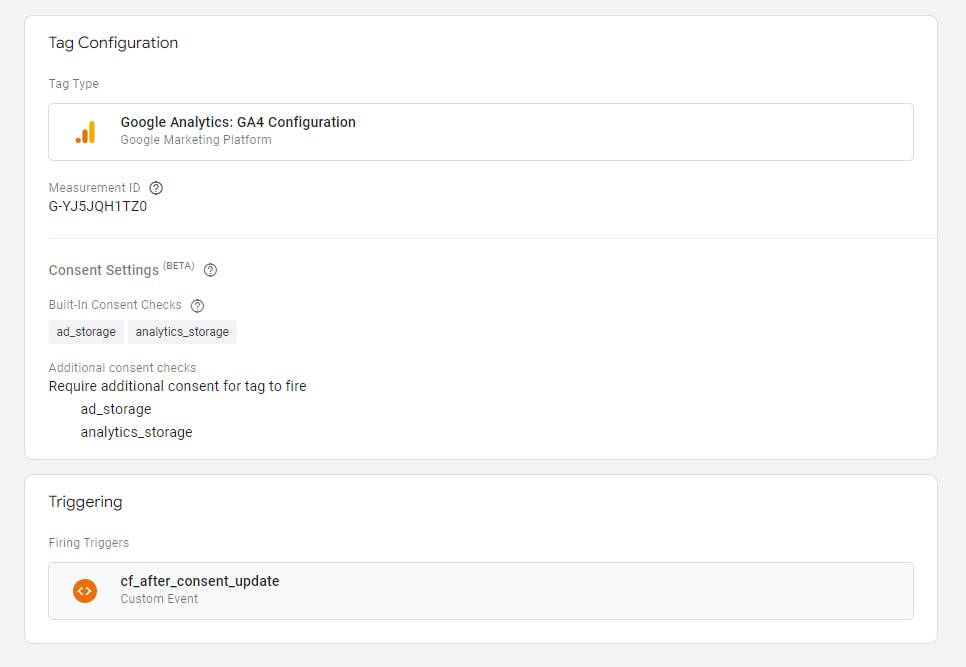
Add the GA4 configuration tag and put your GA4 stream id in the configuration:
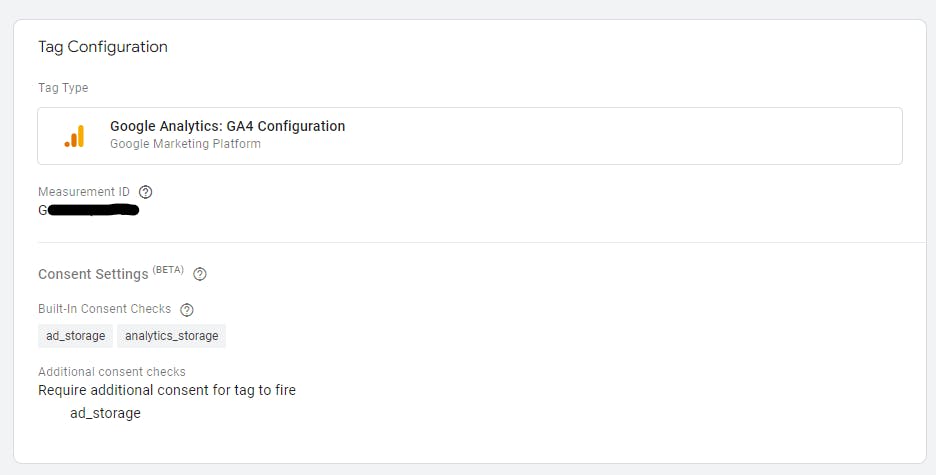
In the advanced settings, add the consent setting needed to trigger the tag:
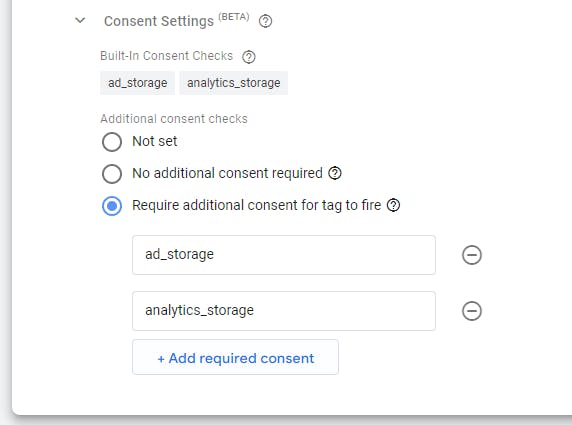
Note that we are adding consent settings that are technically already in place in the tag by default. Consent mode is still in beta, and I've found that these default settings don't always work reliably.
The consent categories in CookieFirst match types of Google consent settings in the following way:
| Category CookieFirst | Type Google Consent |
| advertising | ad_storage |
| performance | analytics_storage |
| functional | functionality_storage |
| functional | personalization_storage |
| necessary | security_storage |
GA4 is therefore classified as a promotion (advertising) and performance tag.
Add a Trigger
For the system to work, triggering must occur in a specific order:
CookieFirst is activated (page loaded) or updated (changed)
Tags are triggered, based on CookieFirst categories chosen by the user
Now let's make sure our tag fires only after CookieFirst is enabled. Create a new "Custom Event" trigger. The name of the event in question is cf_after_consent_update:
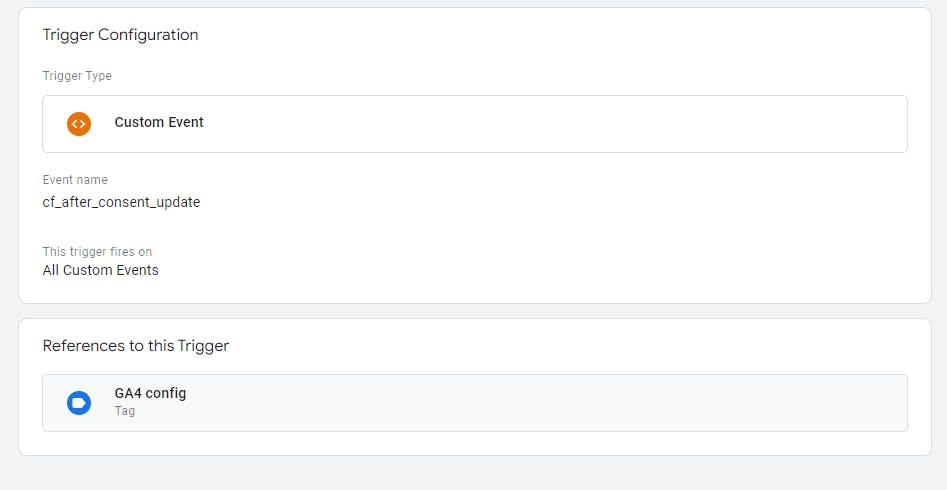
Associate this trigger to the GA4 tag:
Publish your GTM container, and voila! You will now be able to see the GDPR banner on your app:
Using Analytics Debugger see that GA4 does not fire initially, even though GTM is working fine :

You will need to give your consent via CookieFirst to trigger the tag.
To comply with the GDPR law, configure all your tags on the same model and do not hesitate to explore the features of CookieFirst.
Happy tagging!